Address
304 North Cardinal
St. Dorchester Center, MA 02124
Work Hours
Monday to Friday: 7AM - 7PM
Weekend: 10AM - 5PM
Address
304 North Cardinal
St. Dorchester Center, MA 02124
Work Hours
Monday to Friday: 7AM - 7PM
Weekend: 10AM - 5PM
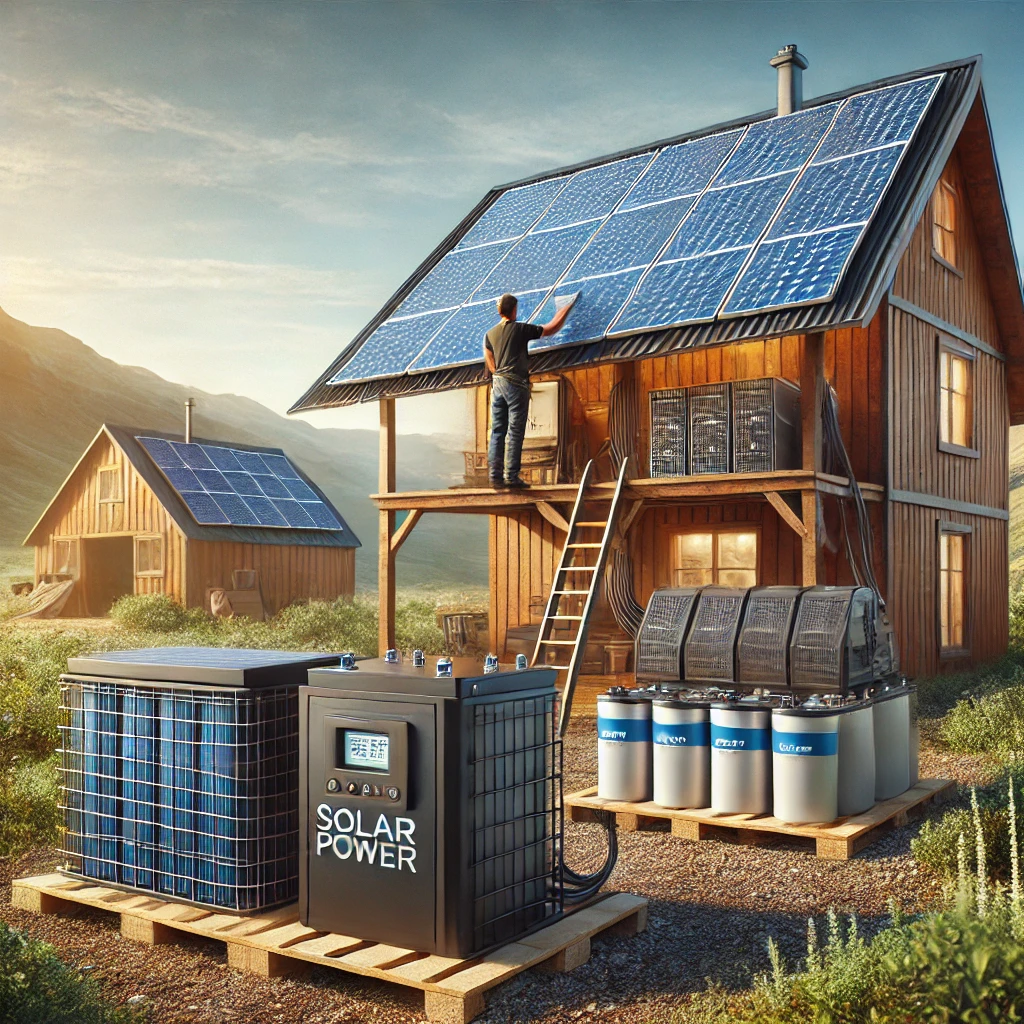
Solar power is one of the best renewable energy sources for off-grid living. Installing your own solar power system can help you generate electricity independently, reducing your reliance on traditional utilities. Here’s a step-by-step guide to setting up a DIY solar power system for your off-grid home.
The first step in setting up a solar power system is to assess your energy needs. Make a list of all the appliances and devices you plan to run on solar power. Calculate how many watts each device uses and estimate how many hours a day each will be in use. This will help you determine how much energy your solar system needs to produce.
Once you know how much energy you need, it’s time to select the right solar panels. Consider the following when choosing your panels:
To use solar power during the night or on cloudy days, you’ll need a battery storage system. The size of your battery bank depends on your daily energy consumption and how long you want to store power. A typical off-grid home may require anywhere from 1,000 to 5,000 watt-hours of battery storage. Consider the following when choosing batteries:
An inverter is necessary to convert the direct current (DC) electricity generated by your solar panels into alternating current (AC) electricity, which is used by most appliances. Choose an inverter that can handle the total wattage of all the devices you plan to power. Make sure to choose an inverter with a surge capacity higher than your normal operating load to handle power spikes from appliances like refrigerators and air conditioners.
Now that you have your components, it’s time to install your solar panels. Follow these steps to install your solar panels safely:
The charge controller regulates the flow of energy from your solar panels to your battery bank. It prevents overcharging and ensures your batteries are charged efficiently. Connect the charge controller to your battery bank and solar panels according to the manufacturer’s instructions. Choose a charge controller that is compatible with your battery type and system size.
Once the charge controller is installed, it’s time to connect your battery bank. Position the batteries in a cool, dry, and well-ventilated area. Connect them in series or parallel, depending on the voltage requirements of your system. Ensure that all connections are tight and secure. Use proper safety gear and precautions when handling and wiring batteries, especially if using lead-acid batteries that can emit dangerous gases.
Finally, install the inverter to convert DC power into AC power. Place the inverter in a cool, dry location with proper ventilation. Connect the inverter to your battery bank and then to your home’s electrical system. Make sure the inverter is rated for the wattage you intend to use, and use a circuit breaker to prevent overloads.
Once all components are installed and connected, test your system to make sure everything works properly. Check the battery voltage and monitor the performance of your solar panels and inverter. Ensure that the charge controller is functioning correctly and that you’re getting enough power to meet your daily needs.
Building your own DIY solar power system can be a rewarding and cost-effective way to power your off-grid home. With proper planning, components, and installation, you can generate your own electricity, reducing your reliance on external utilities. Remember to maintain and monitor your system regularly to ensure it continues to function efficiently for years to come.